Showing posts with label whisk. Show all posts

09/09/2012

Mini Victoria Sponges!


These mini Victoria sponge cakes are perfect for kids' parties or wrap them up for someone special in gift boxes. They're extremely versatile and can be simply adapted (e.g. to make chocolate sponges). These delectable little cakes went down a treat with my family and friends!


Ingredients

For the cake:
  • 200g caster sugar
  • 200g unsalted butter, softened, plus a little for greasing
  • 4 medium eggs
  • 1tsp vanilla extract
  • 200g self raising flour, sieved
  • 1tsp baking powder
  • 2 tbsp milk
For the filling:
  • 100g unsalted butter, softened
  • 150g icing sugar, sifted
  • A drop of vanilla extract
  • 340g jar good quality British strawberry jam (or raspberry)
  • Caster sugar to decorate
1. Heat oven to 190C (gas mark 5). Fill a cupcake tray with 12 cases.

2. Beat together the unsalted butter and sugar in a large bowl with a wooden spoon or preferably with an electric mixer until pale and fluffy. This can take up to 10 mins.

3. Break the eggs into a small bowl and add the vanilla extract. Beat the mixture lightly with a fork. We decided to use a handheld, wheel-turner whisk.

4. Add the egg very gradually to the mixture. Do this slowly to avoid curdling. If the mix does curdle, add a tablespoon of flour. Once all the eggs are in, fold in the flour with a large metal spoon. The mixture should be of dropping consistency, if not add a little milk.


5. Divide the mixture between the cupcake cases and bake for about 20 minutes ot until golden and the cake springs back when pressed. Remove cakes from cases and leave to cool on a cooling rack.
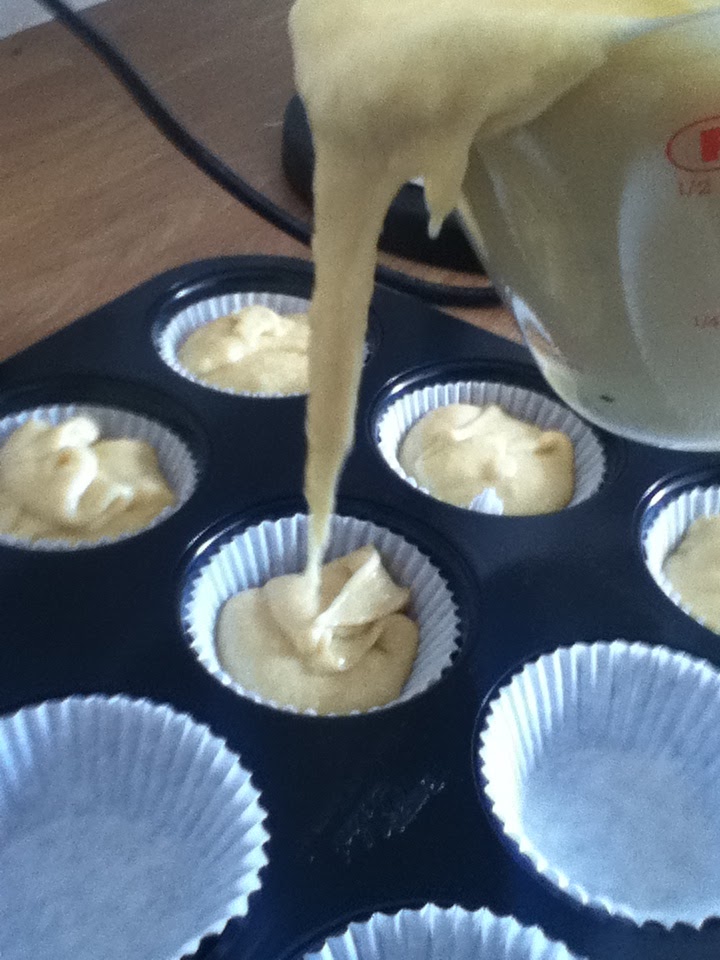
 6. To make the butter icing: Beat the unsalted butter until smooth and creamy, then gradually beat in the icing sugar. Beat in vanilla extract.

7. Cut the cakes in half with a sharp knife (horizontally through the middle of the cake). Spread the butter cream on the bottom half of the cake, followed by a teaspoon of jam. Sandwich the top half of the cake. Dust with a little caster sugar before serving.


8. Keep in airtight container and eat within 2 days.

These cakes were easy to make and the timings on baking gave a perfect sponge consistency! The jam and buttercream together, however, were slightly over-powering. So, I'd recommend adding a very thin layer of both fillings. 4/5


Happy Baking!

02/08/2012

Jaffa Cakes

I heard about this recipe from a friend, she made a video tutorial on how to make them. Click here to see it.
These are amazing! I thought shop-bought Jaffa Cakes were good, but these are better.  The dark chocolate compliments the zesty orange filling so nicely. They take a while to make, but it's worth it.

Ingredients
  • 2 eggs
  • 50g/2oz caster sugar
  • 50g/2oz plain flour, sieved
  • 1x135g packet of orange jelly, chopped
  • 1tblsp orange marmalade
  • 125ml boiling water
  • 200g/7oz dark chocolate
Method
1) Make the jelly first. To do this, chop up the packet of jelly into cubes and put in a medium-sized bowl with the marmalade. Then, add the boiling water. Stir until the jelly dissolves.
2) Line a shallow baking tray with cling-film and pour the dissolved jelly into it. Put in the fridge to set overnight.
3) The next day, when the jelly has set, prepare a bain-marie (fill a pot half-way with water and place a small bowl on top) on the stove, on a low heat so that the water starts to simmer. Pre-heat the oven to 180°C.
Photograph source: afoodieabroad.blogspot.co.uk
3) The recipe says that when the water is simmering to add the eggs and sugar to the bowl on top and whisk until it light and creamy. However, when I did this the egg started to cook. So, I took the bowl off the stove and then whisked  it until combined. Then, I heated the mixture -back in the pot- until it became creamy.
4) Take this off the stove and sift in the flour. Do not mix in the flour, but fold it in.
5) Grease a cupcake tray and fill each section half-way with the batter. Put in the oven and cook for 8-10 minutes.
6) While that's in the oven, break the chocolate into blocks and use the bain-marie (wash it first!) at a low temperature to slowly melt it. Also, take the jelly out of the fridge and the cling-film.
7) When the cakes are out of the oven and cooled, cut circles out of the jelly with a cookie cutter (make sure the circle fits each cake!). Place a circle onto each cake.
8) When that's done, cover each cake with the melted chocolate and put in the fridge to set.

These are very rich and very orangey, so if you find normal Jaffa Cakes too much I wouldn't recommend these. However if you love a good tasty, zingy treat please try these! 4/5

Happy Baking

25/07/2012

Easy-Peasy Vanilla Ice Cream

Vanilla Ice Cream
If I'm honest, I wasn't sure that this would work.  The recipe didn't involve any techniques that I thought people did to make ice cream, it was essentially mixing egg whites with a cream mixture and freezing it.  However, it turned out perfect! The texture and taste were exactly the same as ice cream should be.  It was a great, refreshing treat to cool us down in this weather!

Ingredients
  • 600ml double cream
  • 250g caster sugar
  • 6 eggs, seperated
  • 1/2 - 1 tsp vanilla extract
  • 3 large bowls
Method
1)  In the first bowl, whip the egg whites until stiff.
2)  In the second bowl, whip the cream with the vanilla until stiff.
3)  In the third bowl, beat the egg yolks with sugar until creamy.
4)  Add egg yolks mixture to cream mixture and beat again.
5)  Fold (carefully and slowly passing a spatula down through the mixture, across the bottom, and up over the top. the egg whites into this mixture.  Folding reduces the amount of air lost, opposed to simply mixing.
6)  Pour into a container and freeze for a day.

This recipe is very quick to mix up and simple to do, certainly something I will be doing again! 5/5

Happy baking!

23/07/2012

New tools!

My mum's birthday present finally came in the post! It's a set of mixers, juicers and food processors.  It came with several different beaters for different uses, so hopefully I'll be able to use it for my baking! - Tarryn

15/07/2012

Milk Tart with Cinnamon


Milk Tart

Milk Tart is my favourite dessert.  It's crunchy, biscuity base goes so well with the soft, creamy filling.  I can never get enough! I strongly recommend trying this out.

Ingredients 
- 500ml milk
- 100g sugar
- 30ml plain flour
- 2 eggs
- 40g butter
- 2ml salt
- 30ml cornflour
- 5ml vanilla essence
-  Large pastry dish
- Cinnamon

Method
1)  Measure out milk, sugar, butter and salt into a medium-sized pot.  Set aside.
2)  In a small bowl, measure out the flour and cornflour.  Gradually add drops of milk until it becomes a thick paste.
3)  In a separate bowl, whisk eggs together.  Add to paste.
4)  Turn stove to medium heat and heat the mixture in the pot.  Bring to a simmer, stirring occasionally.
5)  When simmering, add the mixture from the small bowl. Now QUICKLY stir until the mixture becomes a thick paste- this avoids lumps.
6)  Pour into the pastry dish and leave to cool down for a couple of minutes.
7)  Making sure the mixture is level, cover the whole of the top with cinnamon.  Make sure no white is visible.
8)  Put in the fridge to set.

Definitely try this out! Am certainly going to make this again soon.  5/5

Happy baking!