Showing posts with label bake. Show all posts

23/08/2012

Sinfully Sweet Honey Cupcakes


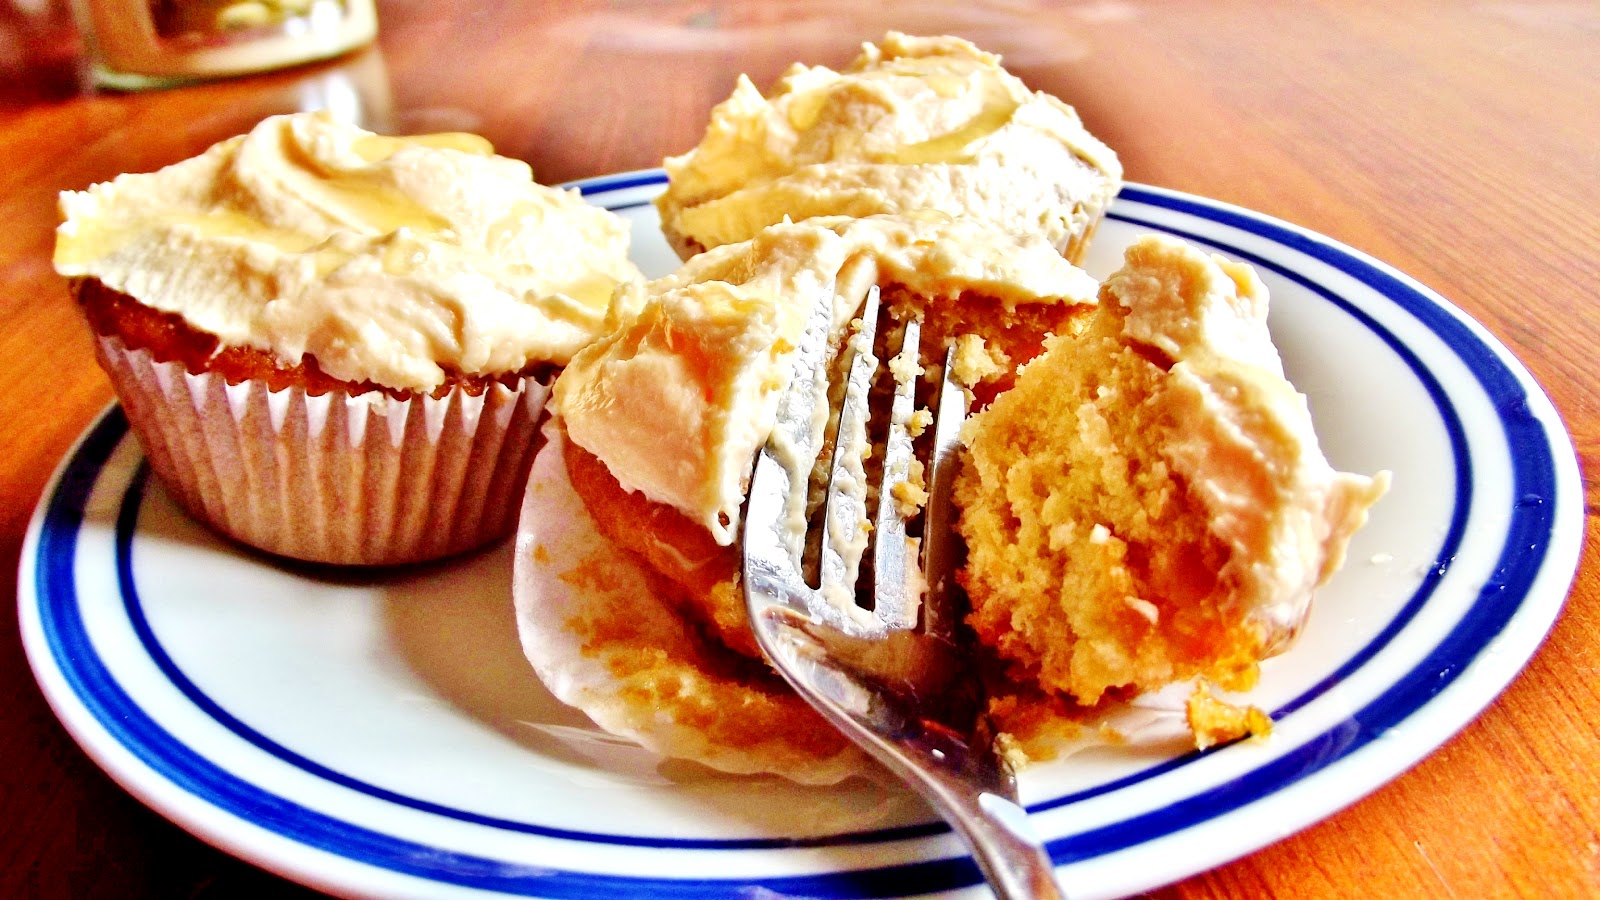
So sweet and sticky! These cupcakes are quite rich, but taste so good! They're easy to through together and take no time to bake. The taste is so unique; the honey flavour is clearly there, but isn't too strong. These little sugar-packed delights are perfect for those with a sweet tooth!

Ingredients
  • 125g clear honey
  • 125g unsalted butter
  • 75g light soft brown sugar
  • 175g self raising flour
  • 2 eggs, beaten
 Method
1) Preheat the oven to 180°C and prepare a cupcake tray with cupcakes cases.
2) In a small pan, weigh out the sugar, honey and butter. Place this on a low heat and stir until melted. Make sure to stir often, otherwise the mixture will stick to the bottom of the pan. When melted, take off the heat and leave to cool.


3) Next you can either pour the mixture into a medium bowl or leave in the pan. Add the remaining ingredients and beat until combined.

4) Pour the batter into the cupcake cases and bake in the oven for 7-9 minutes. You can prepare the icing/decoration in this time. Remember to stick a skewer in the center to check if they are done; if it comes out clean, they are baked.  The cakes should be golden brown.


5) Take them out of the oven and leave in the tray for several minutes. Then place them onto a cooling rack to cool completely.
6) When cool, you can ice or decorate them as you please! I iced mine with buttercream- my favourite- and drizzled honey on top. However I would advise you to not put the honey on, it made them quite rich!

A little too sweet for me, but my friends loved them! Sinfully sweet and rather rich, sweet tooths will love these! 4/5
Happy baking!

20/08/2012

Apologies!

You would think that the summer holidays would give us plenty of free time to bake, but no. We've been too busy to do anything! Rosa and I are trying to meet up again so that we can blogblogblog without interruptions. Will try to bake soon! -Tarryn

13/08/2012

Classic Victoria Sponge


 I wanted to make something to celebrate the end of the Olympics and team GB, so I made a classic Victoria Sponge. I know this is a day late, but I fell out with the icing yesterday. Firstly, I attempted to make a cream cheese icing but it completely flopped, who knew that simply butter, cream cheese and icing sugar would form a consistency of water? So today, I tried a sweetened cream. I was planning to colour it with food colouring and ice the Union Jack (for team GB) onto the cake, but apparently if you add food colouring to sweetened cream it separates and turns to curds and whey. Oh well! Learn from your mistakes.
 Victoria Sponge is not my favourite cake, as I don't particularly like jam. However this recipe has made me change my mind! Light, sweet, soft, fantastic. So easy to make and a great treat if you're feeling a bit peckish!
Ingredients
  • 4 free-range eggs
  • 225g/8oz caster sugar, plus a little extra for dusting the finished cake
  • 225g/8oz self-raising flour
  • 2 tsp baking powder
  • 225g/8oz softened margarine or butter, plus a little extra to grease the tins
  • Cream and jam for filling and/or icing
Method
1) Preheat the oven to 180C/350F/Gas 4.

2) Grease and line two cake tins, making sure you get up all the sides so that when the cake is baked it will be easy to take out.

3) For this recipe, use the all-in-one method. This is simply putting every single ingredient into the bowl and mixing them together, in the order listed above. When everything is combined, the finished mixture should fall off a spoon easily.
4) Next, pour the mixture into the two cake tins. Try to get the same amount in each tin, but it doesn't matter if the amounts are slightly different.
5) Bake for 20-25 minutes. To test if they are baked, stick a skewer down inside the center of the cake and if it comes out clean the are ready.  I found that the cakes felt too soft and under-baked, however this is how Victoria Sponge is meant to be; it is a very delicate cake. The cakes also have to look golden-brown when they are done. Put the tins on the side and after several minutes move the cakes onto a cooling rack.
6) When cool, cover one half with the jam (you can also cover cream on top too or you can use it for icing at the end). Sandwich the other half upside-down on top of the covered half, so that the top of the cake is flat. You can use ay icing you want- a dusting of icing sugar, butter-cream, royal icing. I sweetened the cream (using this recipe) and used it as icing instead of a filling.

This cake has converted me to loving jam on my cake! I now also have a special love for delicate cakes like Victoria Sponge, opposed to dense chocolate fudge cakes.  4/5

Happy baking!

12/08/2012

Next bake

Click here to see the recipe
To celebrate the end of the Olympic Games, I would like to bake something that reflects team GB. So, either today or tomorrow I will be baking a classic Victoria Sponge with a Union Jack pattern in the icing! -Tarryn
Photo credits: www.madewithpink.com/

07/08/2012

'Melting Moments'


Melting Moments are the heirs to custard creams. Their short-bready texture makes them the perfect accompaniment to a nice cup of tea - the prefect tea time treat! Smooth buttercream sandwiched between sweet and crunchy biscuits. We added a touch of red food colouring to the icing for decoration. We also dusted our COAB (Confessions of a Bake-a-holic) heart logo onto the top of our biscuits with icing sugar to make them our own.

Ingredients:
  • 200g unsalted butter, softened.
  • 190g icing sugar, plus more for dusting.
  • 155g plain flour
  • 140g corn flour
Method:

1. Pre-heat the oven to 180C, gas mark 4. Line/grease two baking trays with baking paper or butter.

2. For the biscuits, sift all the dry ingredients together in a bowl and add the butter. Mix well with an electric mixer.

3. Using your hands roll tablespoonfuls of the mixture into about 24 small balls. Place the bowls on the baking trays. Gently press down on the top of each biscuit with a fork to flatten them so they are almost doubled in size.

4. Bake for about 9 minutes until they're light, golden brown. Don't leave them in too long or they will become too crispy.

5. When they have cooled, dollop a spoonful of icing in the center of one disc and place another of the biscuits on top to sandwich them together. We have used our own recipe for the butter cream icing. Click here to see the link.

6. Dust with icing sugar to decorate. We used a heart stencil to dust on the COAB logo.


This recipe was slightly deceiving. Many of the claims made by the authors turned out to be inaccurate. Because of this we had to tweak it in a few places and use some creativity when decorating to hide the discrepancies. The biscuits were tasty overall, but slightly over-sweet and filling. 3/5

06/08/2012

Rainbow Cupcakes!


Rosa and I have been wanting to try these for a while, so were excited about how these pretty cakes would turn out. We weren't let down! Using a simple vanilla cupcake recipe and several food dyes, we have created the perfect party treat.  We are looking forward to sitting down with this tasty treat and a Harry Potter movie later on this evening!

Ingredients

  • 120g plain flour
  • 140g caster sugar
  • 1 ½ tsp baking powder
  • a pinch of salt
  • 40g unsalted butter, at room temperature
  • 120ml whole milk
  • 1 egg
  • ¼tsp vanilla extract
  • 1 quantity vanilla frosting
  • hundreds and thousands or other edible sprinkles, to decorate
  • a 12-hole cupcake tray, lined with paper cases
  •  Food colourings of your choice
Method
1. Preheat the oven to 170°C (325°F) Gas 3 and prepare a cupcake tray with cases.

2. Put the flour, sugar, baking powder, salt and butter in a bowl and beat until you get a sandy consistency and everything is combined. Gradually pour in half the milk and beat until the milk is just incorporated.

3. Whisk the egg, vanilla extract and remaining milk together in a separate bowl for a few seconds, then pour into the flour mixture and continue beating until just incorporated (scrape any unmixed ingredients from the side of the bowl with a rubber spatula). Continue mixing for a couple more minutes until the mixture is smooth. Do not overmix.

4. Seperate the mixture into several bowls and add a small amount of food colouring to each bowl (each bowl a different colour). Mix until all dye is combined.

5. Add a spoonful of each coloured batter to each case one after another, in layers.

6.Leave in the oven for 20-25 minutes.

7. When cooled, decorate as you please.


Moist, soft, sweet, and definitely vibrant, the vivid colours would cheer up anyones' day! They taste amazing but a lot of effort is involved for such simple cakes. Overall, I would reccomend these; 4/5.

Happy baking!

04/08/2012

Finally!

Finally! Tomorrow I will be visiting Rosa, so be prepared for a lot of baking! Comment or contact us about any recipes you would like us to bake. -Tarryn